documentation
Projects
Once you access a project in the data tab for the first time, you will see an empty window like the following one.
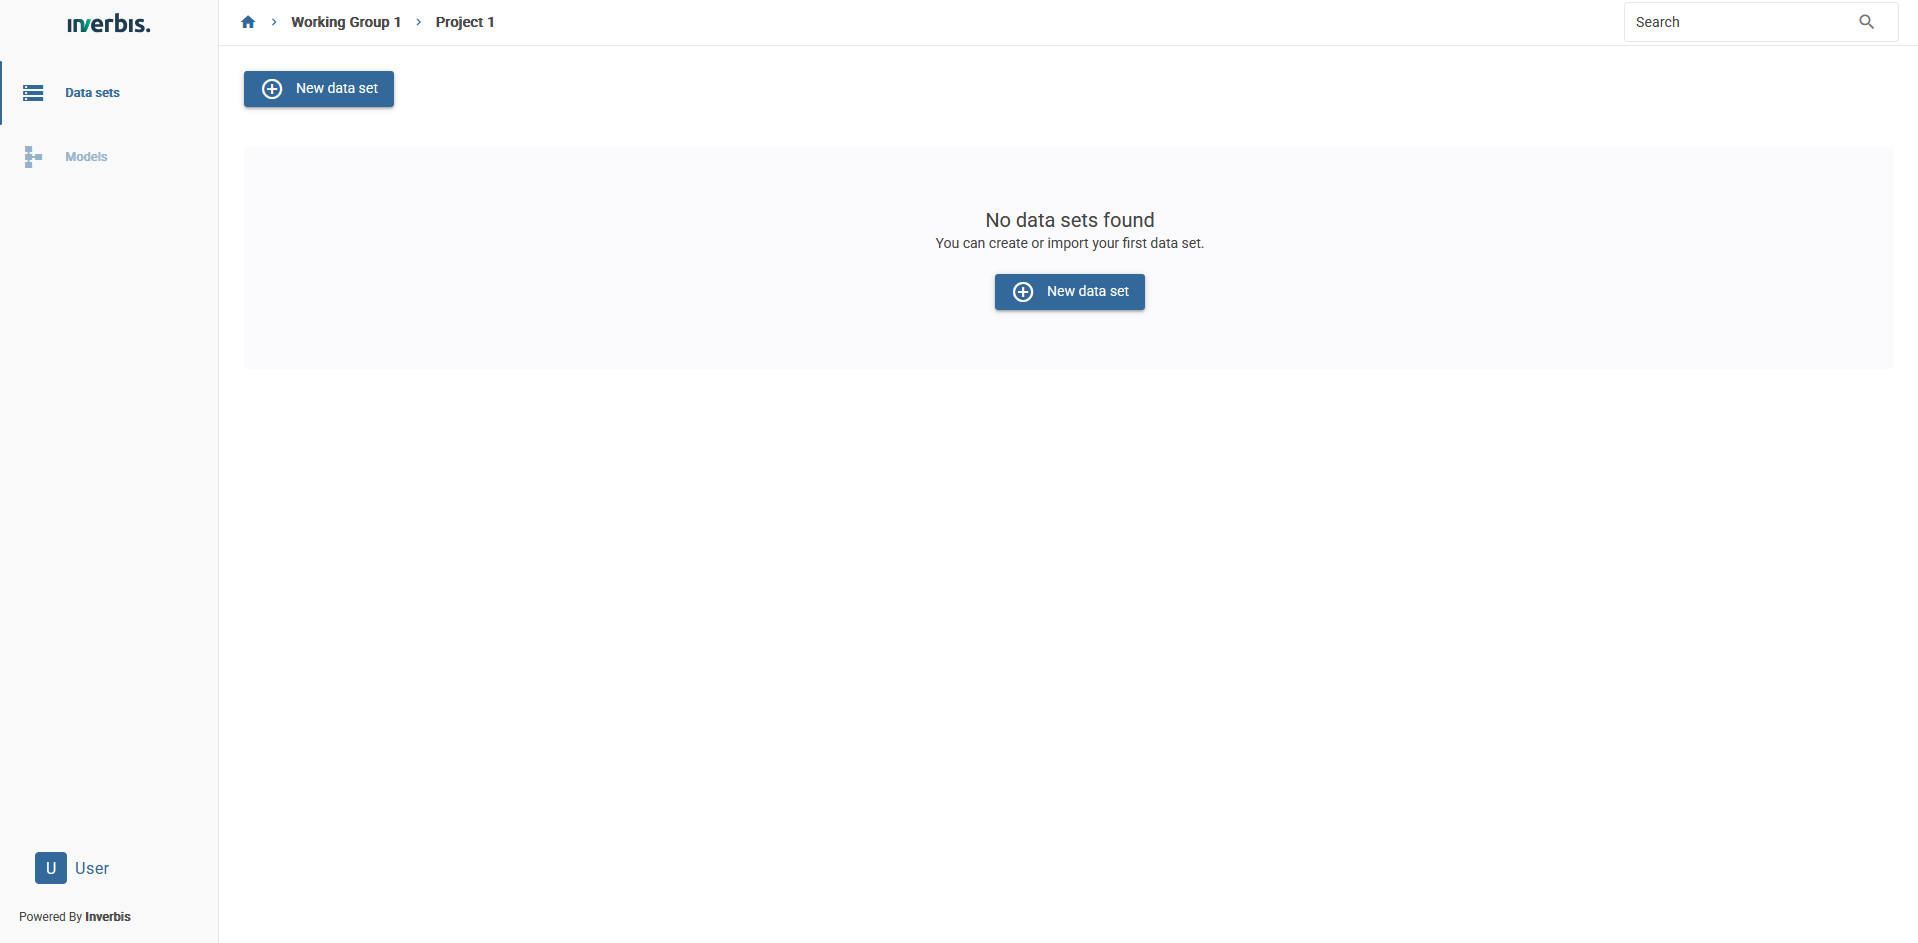
In the left sidebar we find two areas: “Datasets” -selected by default- and “Models”.
New dataset
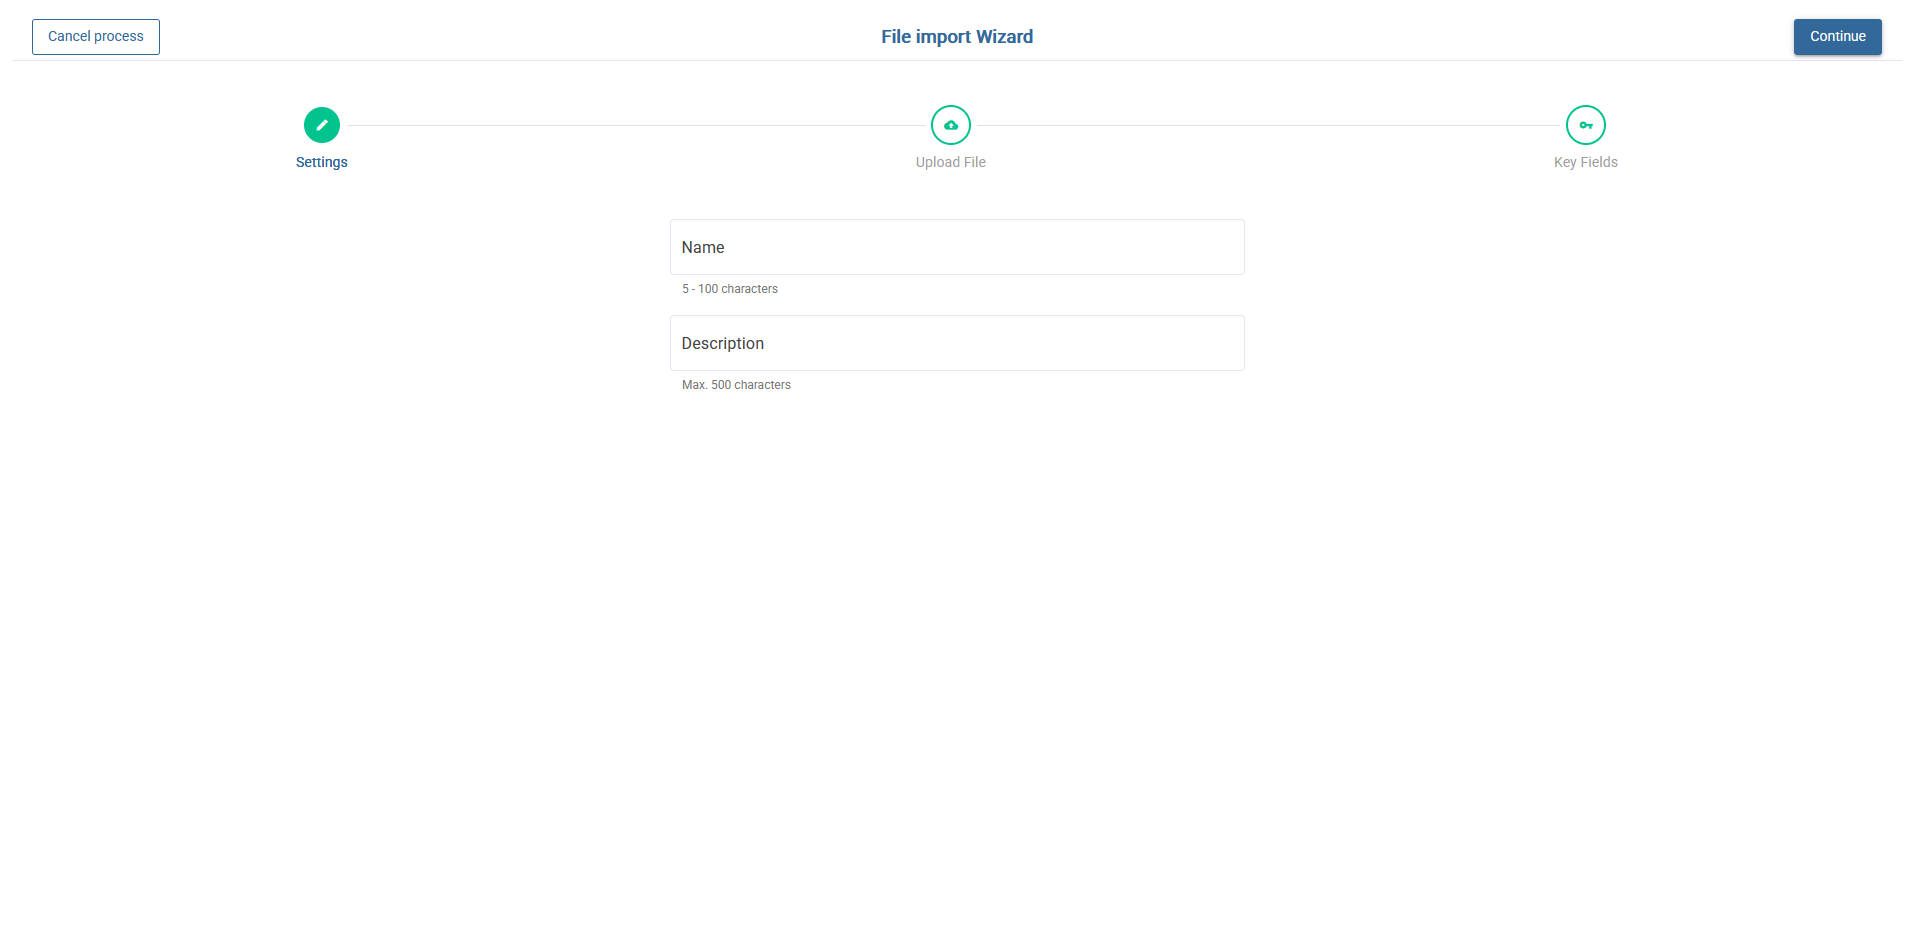
Step 1: Settings
Once you have clicked on the ‘New dataset’ button, a tab will appear, where you can enter both the name and description of the dataset. Next, you must press the continue button.
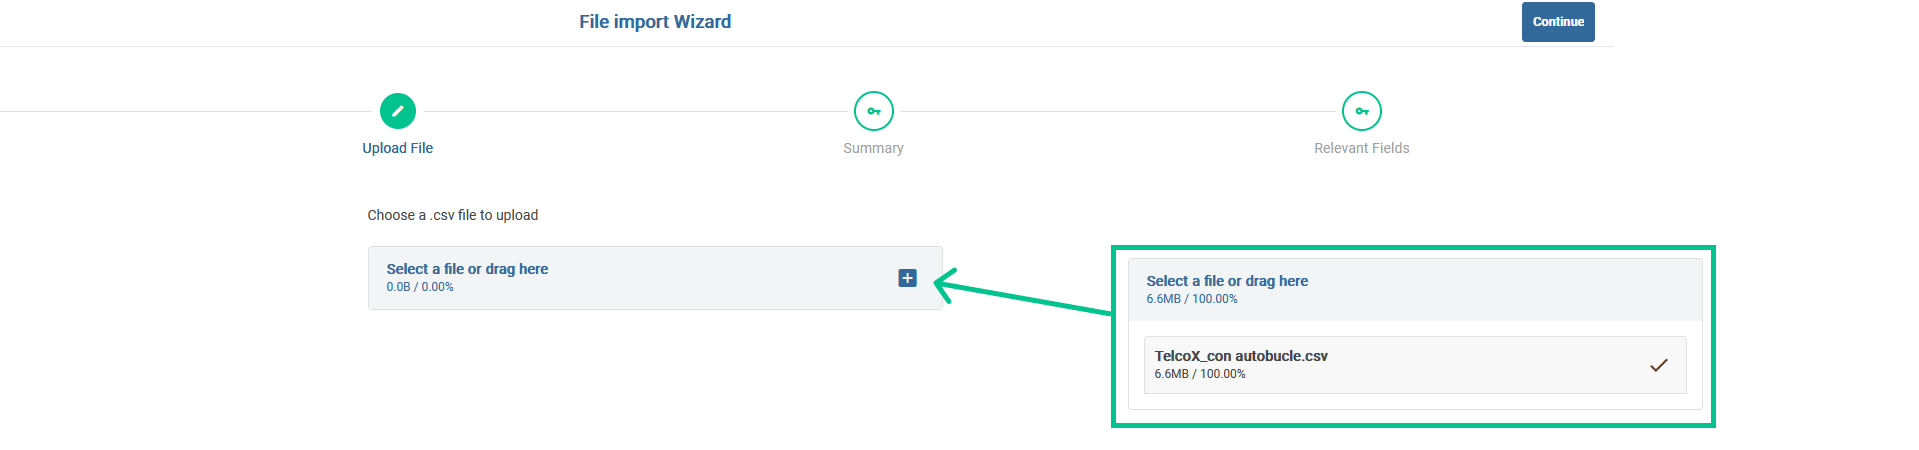
Step 2: Upload file
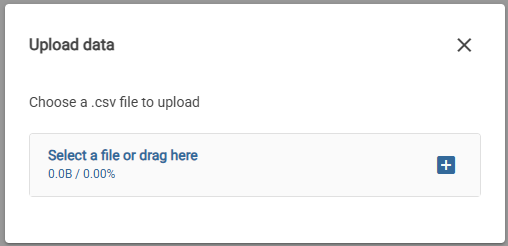
In the following window, you will have the possibility to upload the file located in your local directory. To do this, you can drag the file over the blue square or click the button with the “+” symbol. Wait until the file is completely uploaded (100%) before pressing the ‘Continue’ button.
Step 3: Summary: Key fields
🔐 The selection of key fields is mandatory and will be done step by step.
Once you select the column indicated for each step, the interface will automatically move to the next step. The four steps correspond to the selection of the previously defined key fields.

In addition, there is also the option to homogenize the categorical attributes, which allows the values of the categorical attributes to be standardized in a uniform format, converting them all to uppercase. This action helps avoid considering duplicate or different attribute values due to differences in capitalization. When you have finished the process, you must press the continue button.

More info about Key Fields
The data model is divided into key fields and attributes. The key fields and their explanation are as follows:
- Trace Id: must contain a unique identifier for each execution of the process (mandatory).
- Activity: must contain the name of each of the activities (stages) that make up the process (mandatory).
- Start Date: must contain the time stamp when the execution of each activity starts (mandatory).
- End Date: must contain the time stamp at the end of the execution of each activity (optional).
Attributes are all those columns that provide additional information concerning each execution of an activity or process step.
Dataset details
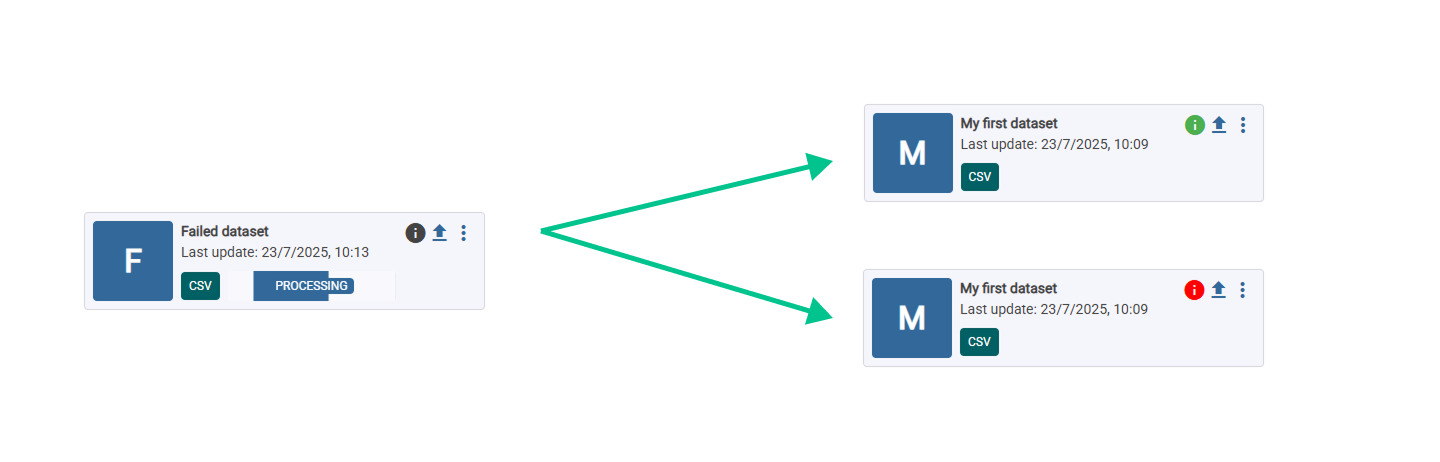
Once the import of a dataset has been completed, it will start to be processed. If everything has been done correctly and the data file is valid, when the process is finished it will be indicated with a green icon inside the dataset frame. Otherwise a red icon will appear.
You can update your data by clicking on the arrow button highlihgted below.
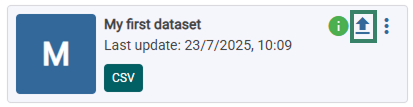
A new window will appear. There, you can drop the file with the updated data.
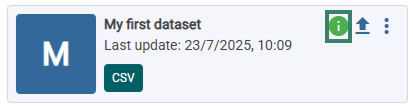
You can access to dataset-specific settings clicking on the information icon.
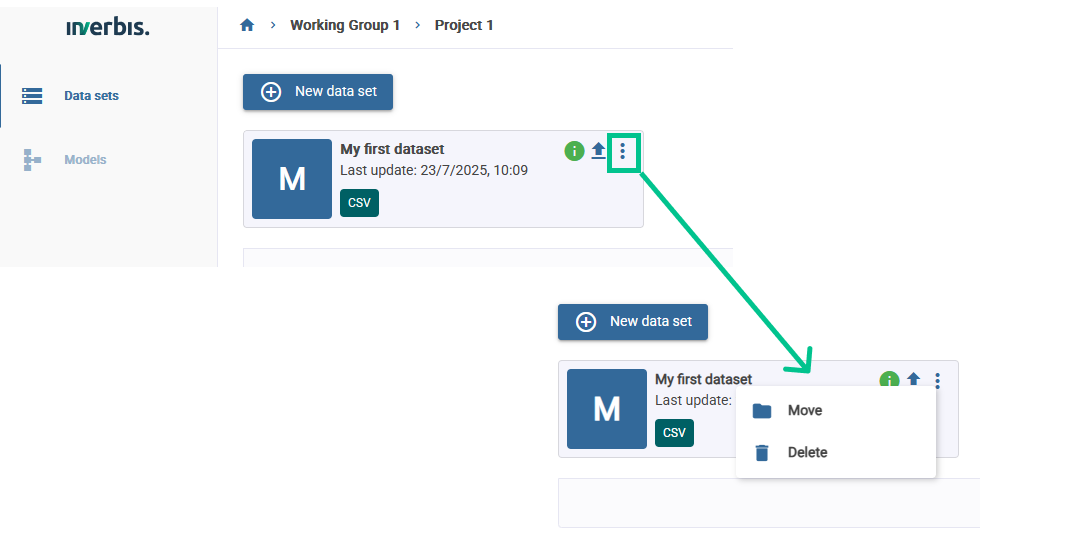
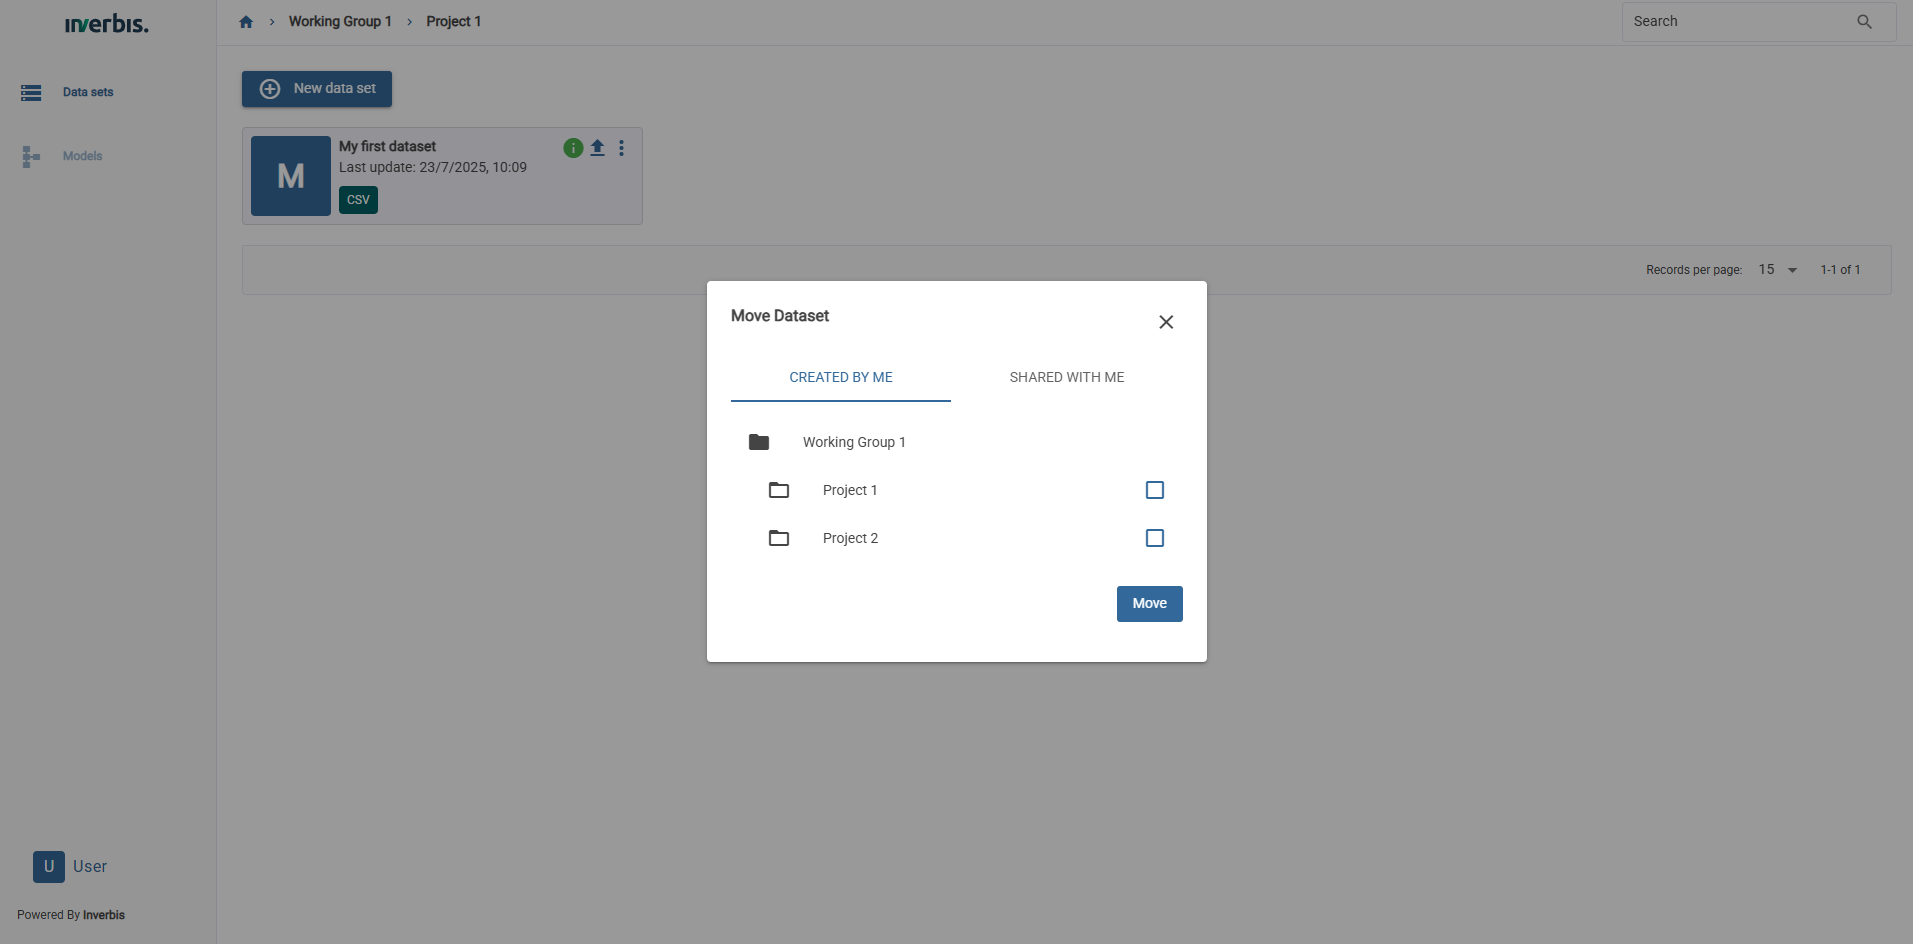
The three-dot button allows moving it to another project or deleting it.
Settings
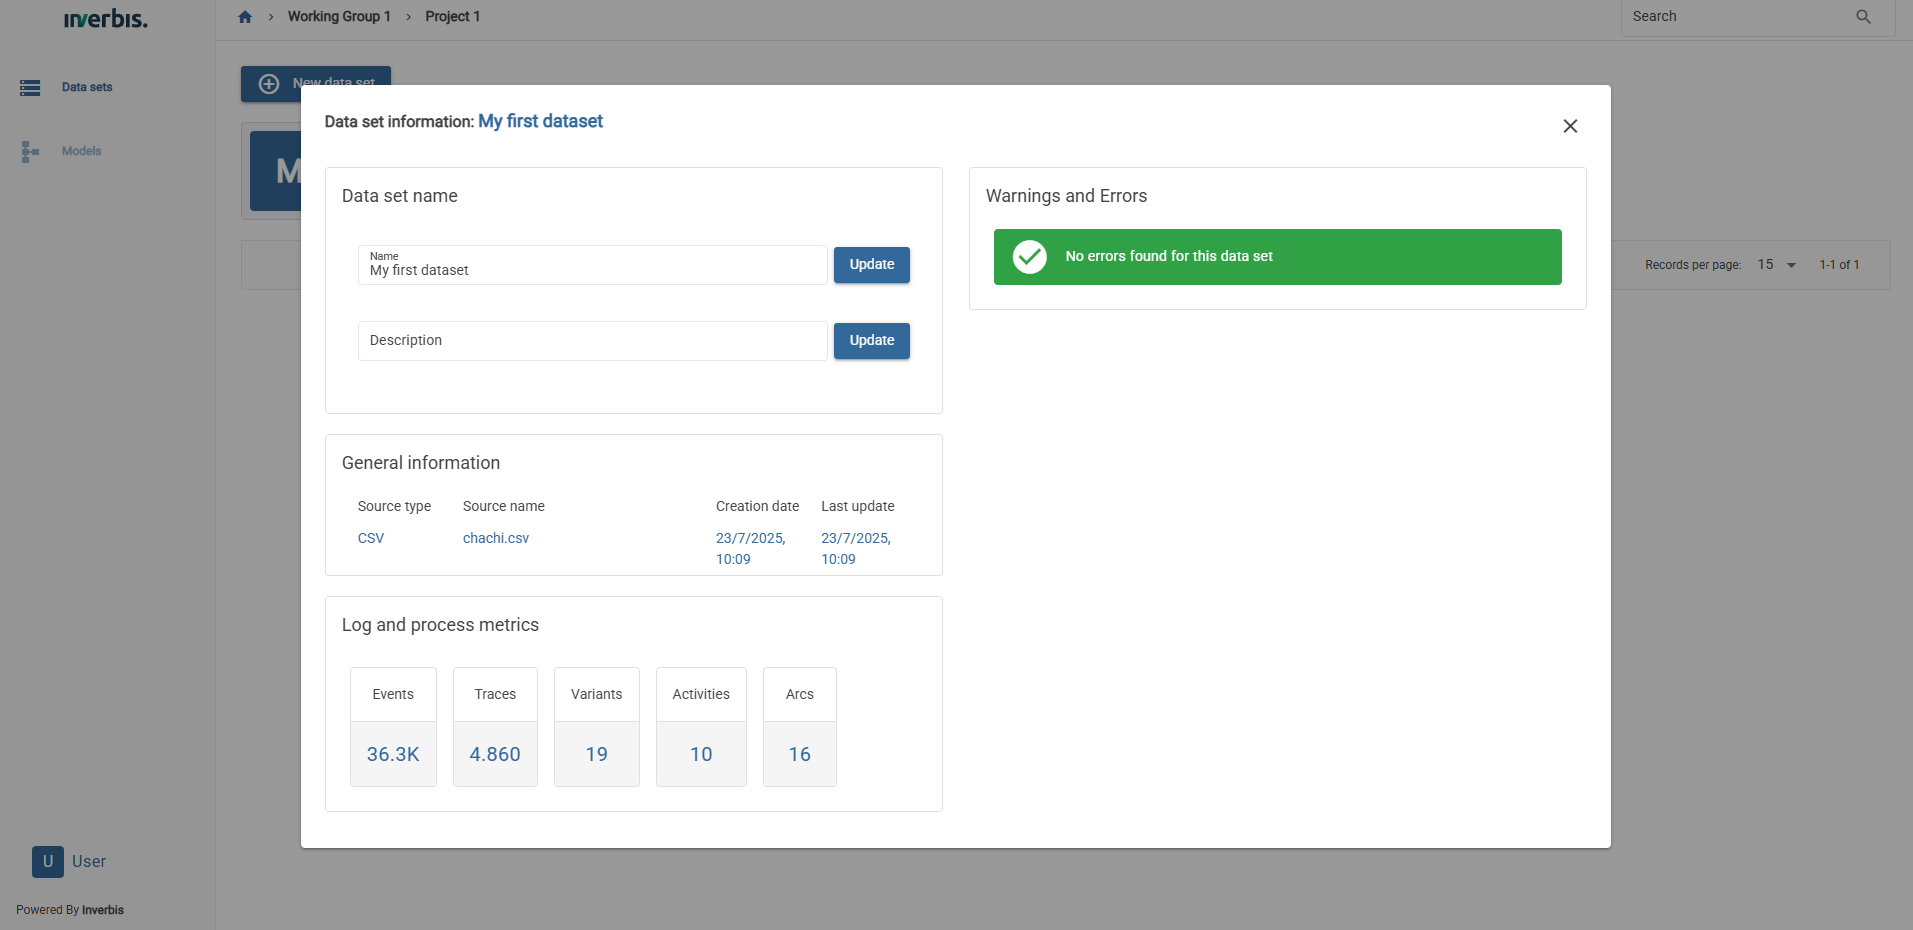
If you click the information icon, a modal window will appear with different sections:
- Data set name: where you can update the name and description of the dataset.
- General information: where you can find details about the dataset such as the creation and last modification date, file name, and format type.
- Log and process metrics: general information about the most relevant metrics.
- Warnings and errors: shows the import errors and warnings. They might present different colours, depending on the severity of the error.
Move
If you select ‘Move’, you can change the location of the dataset, taking it to another working group of any project.
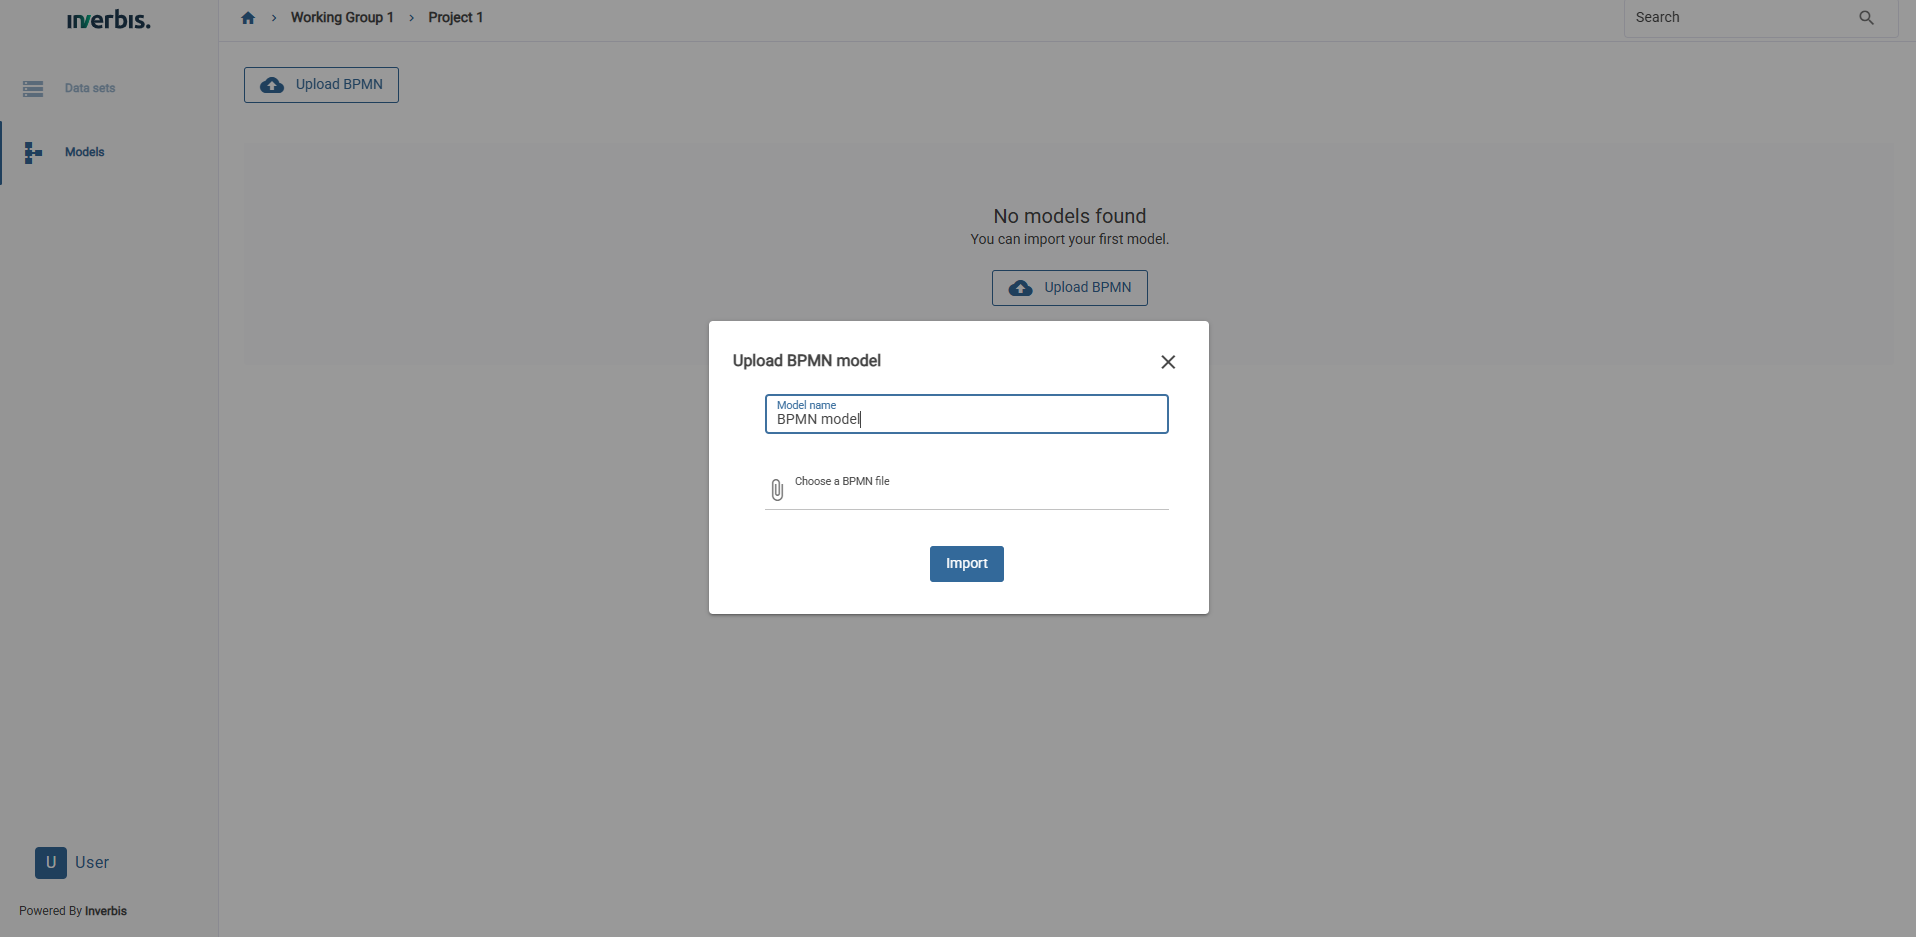
Models
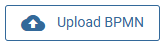
There are two possibilities to import a BPMN model:
- Upload a BPMN. Data set imported.
- Generating a BPMN
To upload a model, click on the BPMN upload button, then a window will appear in which the name of the model must be entered. Clicking on the upload BPMN file button will open a window where you can select the local path from which you want to import.
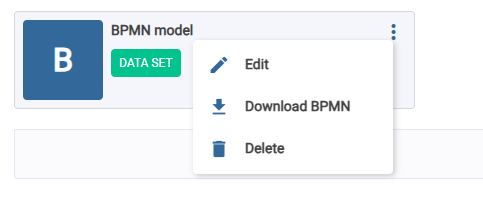
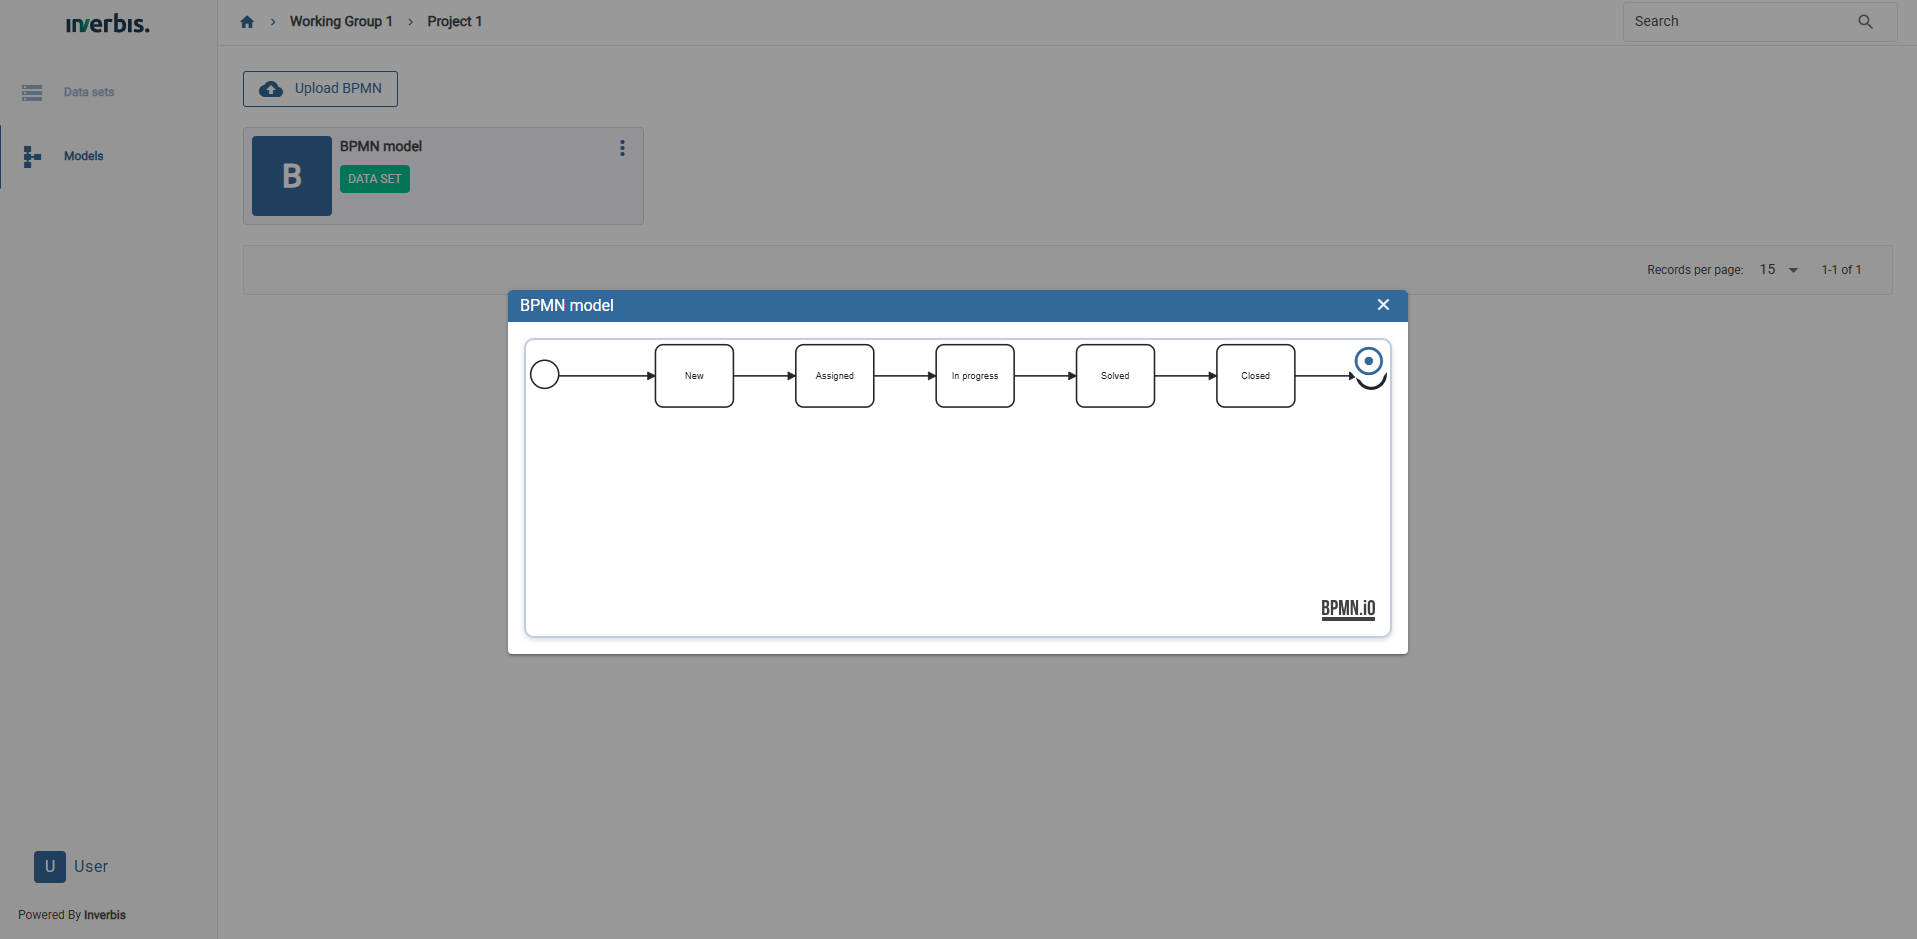
Clicking on a model will open a modal window with a preview of the model.
Using the three dots button, you can edit the name, download or delete the model.